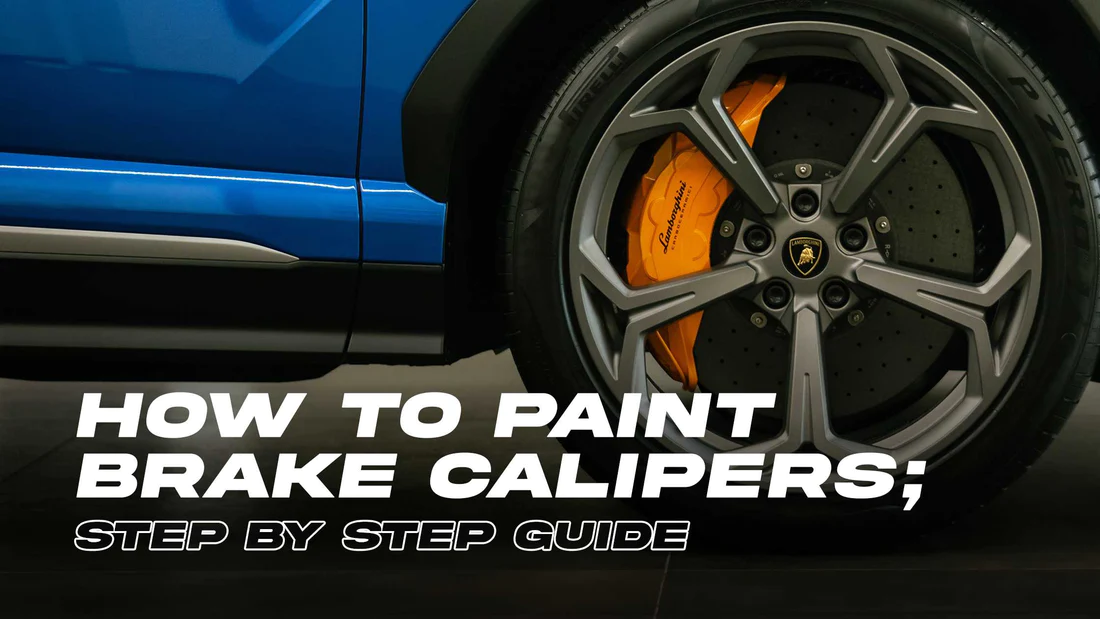

When it comes to giving your car a unique appearance, painting your brake calipers can be an excellent way to achieve that. Not only does it enhance the overall look of your wheels, but it also protects brake calipers from corrosion and rust. Most people shy away from this task, thinking that it’s a job best left to professionals. However, with the right tools and knowledge, anyone can paint their brake calipers at home. In this article, we’ll take a look at how to paint brake calipers step-by-step so you can feel more comfortable doing the job on your own. Follow these simple steps, and you’ll end up with a professional-looking finish that will make your brake calipers stand out.
Gather Supplies
Before you can start painting your brake calipers, you’ll need to gather some essential supplies. Here is a list of the tools and materials you’ll need:
- Brake cleaner
- Masking tape
- Sandpaper or sanding wheel
- Primer
- Brake caliper paint
- Clear coat
It’s important to use high-quality products to ensure the best possible result. Many of these supplies are readily available at your local auto parts store or online. When purchasing, be sure to check the manufacturer’s instructions for compatibility with your caliper material.
It’s worth noting that some kits come with all of these materials included, and purchasing a kit can be an easy way to ensure you have everything you need. Additionally, if you are unsure about what products to buy or where to purchase supplies, it is best to ask for advice or from a professional or experienced friend. With your supplies in hand, you’re ready to begin the process of painting your brake calipers.
Prepare the Calipers
The first step in painting your brake calipers is to prepare them properly. Here’s what you’ll need to do:
- Remove the wheels: Before you can start working on the calipers, you’ll need to remove the wheels. Be sure to use jack stands or wheel chocks to secure the car safely.
- Clean the calipers: Use a brake cleaner to remove any dirt, dust or debris from the calipers. This is to ensure that the primer and paint will adhere correctly. It’s important to note that the calipers need to be completely dry before moving on to the next step.
- Sand the calipers: Use sandpaper or a sanding wheel to rough up the surface of the calipers gently. This step is crucial for the primer and paints to stick to the surface of the calipers. Be sure to remove any loose debris once you have sanded the calipers.
- Mask off the surrounding areas: Use masking tape to protect the surrounding areas, such as the brake rotor, brake lines and suspension components, from overspray. Make sure to cover them thoroughly so that no paint gets on them.
- By following these steps, you’ll ensure that the calipers are well-prepared for painting. A well-prepared surface provides a smooth and even finish, and also helps the paint last longer on the calipers.
By following these steps, you’ll ensure that the calipers are well-prepared for painting. A well-prepared surface provides a smooth and even finish, and also helps the paint last longer on the calipers.
Apply Primer
Applying a primer is an important step when painting brake calipers, as it provides a smooth and even base for the paint to adhere to. It also helps prevent the paint from chipping or scratching off. Here’s how to apply the primer:
- Shake the can: Before using the primer, shake the can thoroughly for about a minute to ensure that the primer is mixed well.
- Apply the primer: Spray the first coat of primer on the brake calipers using smooth, even strokes. Be sure to cover the caliper entirely with primer, but do not oversaturate it. Wait at least five minutes to allow the first coat to dry.
- Apply additional coats: Apply a second coat of primer if necessary, depending on the color of the calipers and the type of primer being used. Generally, two coats of primer are enough. Wait for the primer to dry completely before moving on to the next step. The drying time can vary depending on the primer being used, so be sure to read the manufacturer’s instructions.
Don’t forget to follow the manufacturer’s instructions for the specific type of paint you are using for the best results.
Apply Clear Coat
Applying a clear coat is an essential step when painting brake calipers, as it provides an extra layer of protection and durability to your painted calipers. The clear coat will also help to protect your brake calipers from UV rays, rust, and other types of damage. Here’s how to apply a clear coat:
- Choose the right kind of Clear Coat: Choose a high-quality clear coat that is specifically designed for brake calipers, as it will be able to withstand high temperatures and brake dust without deteriorating. Spray cans of clear coat are available at auto parts stores and online and are typically labeled as “high-heat coating” or “brake caliper clear coat.”
- Apply the clear coat: Wait at least 30 minutes after applying the last coat of paint to apply the clear coat. Begin by shaking the can thoroughly for about 1-2 minutes before use. Spray the can in thin, even layers, taking care to cover the entire caliper. It’s best to apply two to three coats of clear coat, waiting for each coat to dry for around 30 minutes before applying the next one.
- Let the clear coat dry: Once you have applied the final clear coat, let your calipers dry for at least 24 hours before handling or reinstalling the wheel. This will ensure that the clear coat has adequately cured and is ready to provide your calipers with the protection they need.
With these steps, you will have successfully painted and clear-coated your brake calipers, providing them with the extra level of protection and durability they need to perform optimally. Remember, it is vital to use appropriate supplies when painting your brake calipers in terms of both paint and clear coat.
Reassemble
Now that you have painted and clear-coated your brake calipers, it’s time to reassemble your car safely. Here are the final steps:
- Remove the masking tape: Gently remove the masking tape from the areas around the brake caliper.
- Reattach the wheels: With the masking tape removed, it’s time to put the wheels back on. Line up the wheel with the bolts, and tighten the lug nuts by hand. Once they are tight, use a torque wrench to tighten the lug nuts to the manufacturer’s recommended torque specifications. Be sure to use a star pattern to tighten the lug nuts, and double-check that they are all tight before lowering the car.
- Check brake function: After reassembling your car, do a brake test to ensure that everything is working correctly. Pump the brakes a few times before beginning to drive to build up pressure in the system. Then, test the brakes at a low speed, making sure they are responsive and that there isn’t any noise or vibration.
With these steps, you should have beautifully painted brake calipers properly installed and ready to show off. Remember that it’s crucial to test your brakes before driving your car after any maintenance work on them. With proper care, your newly painted calipers will add an extra touch of style while simultaneously keeping your brakes protected.
When It’s the Best Option to Call in an Expert
Painting brake calipers is not a project that should be taken lightly, as the wrong move could lead to expensive mistakes. It’s important to know what you’re doing, which is why it’s better to leave the job to an experienced professional. If you don’t have enough knowledge and experience with painting brake calipers, it can be easy to make mistakes such as using inadequate materials or applying paint unevenly. In addition, brake calipers contain sensitive parts that need to be handled safely and correctly in order for them to remain functioning properly.
For those who are inexperienced or unsure about how to paint brake calipers by themselves, hiring a professional is always the best bet. Professionals have access to top-quality supplies and tools, as well as years of experience under their belt when it comes to working on brake calipers. Moreover, they can help take away any stress associated with painting your own brakes. So if you’re looking for convenience and peace of mind while getting a high-quality job done, TPT Foreigns Brake Caliper Custom Painting Services in Miami is definitely the way to go!
Give Your Ride the Ultimate Upgrade with TPT Foreigns
Not sure if you can tackle a brake caliper painting project on your own? TPT Foreigns brake caliper custom painting service in Miami is the perfect solution. With our experienced team of painters and top-quality supplies, you can trust us to create a unique look that reflects your personality. We guarantee outstanding personal service and results that will make all your friends jealous. Don’t compromise on quality; get the ultimate upgrade for your car with TPT Foreigns!
At TPT Foreigns, we take pride in our excellent customer service. Our team is friendly, knowledgeable, and dedicated to exceeding your expectations. We go the extra mile to ensure that you are happy with our work.
We understand that your car is more than just a vehicle; it’s a reflection of your personality. That’s why we take the time and care necessary to make sure that the final result is always a unique reflection of you.
If you’re looking to add some serious style to your ride, there’s no better choice than TPT Foreigns.Schedule your custom brake caliper painting service with TPT Foreigns today and give your ride the ultimate upgrade!
Bottom Line
Painting your brake calipers can seem like a daunting task, but with this step-by-step guide, it can be a workable process. By following the proper steps on how to paint brake calipers outlined in this article, you can give your car a unique and stylish look that will turn heads.
It’s important to remember that the key to a professional-looking paint job is preparation. Take the time to clean and prepare the surface of the brake calipers before painting, and use high-quality supplies to ensure the best results. Properly maintaining your painted brake calipers is also essential to keep them looking great, so avoid using harsh chemicals, abrasive cleaners, or power washers on them.
Painting your brake calipers is a rewarding task that can add style and protection to your car. It’s an inexpensive way to give your vehicle a brand-new look, and with the right tools and techniques, it’s something that can be done from home. So, next time you’re looking for a fun weekend project, try painting your brake calipers and see the difference it makes!